
An electronic 7 day timer is a programmable device that automates turning devices on/off over a seven-day period‚ offering convenience and efficiency for scheduling tasks.
1.1 What is an Electronic 7 Day Timer?
An electronic 7 day timer is a programmable device that allows users to schedule operations for up to seven days. It features a user-friendly interface‚ enabling the setup of specific on/off times for devices. These timers are widely used in home automation‚ lighting systems‚ and appliances‚ offering precise control and energy efficiency. They often include memory storage for programmed settings and may support remote control functionality.
1.2 Importance of Using a 7 Day Timer
An electronic 7 day timer offers energy efficiency‚ convenience‚ and consistency. It automates device operations‚ reducing manual intervention and potential errors. Consistent scheduling ensures predictable functionality. Energy savings and extended device lifespan are additional benefits. This makes it ideal for home automation and security systems‚ providing users with a reliable solution for managing their appliances efficiently.
Features and Functions of a 7 Day Timer
A 7 day timer offers programmable scheduling‚ multiple on/off cycles‚ memory storage for settings‚ LCD display‚ and battery backup‚ ensuring precise control and reliability.
2.1 Types of Electronic 7 Day Timers
Electronic 7 day timers come in various types‚ including digital‚ analog‚ and smart timers. Digital timers offer touchscreens and programmable interfaces‚ while analog timers provide simple dial controls. Smart timers integrate with home automation systems‚ enabling remote control via smartphones. Plug-in and in-wall timers are common‚ with some featuring energy-saving modes and astronomical scheduling for seasonal adjustments.
2.2 Key Features to Look For
When selecting an electronic 7 day timer‚ consider programmability‚ display type‚ and control options. Look for timers with backlit LCD screens‚ touch-sensitive interfaces‚ or manual dials; Battery backup ensures settings are retained during power outages. Wi-Fi or Bluetooth connectivity enables smartphone control. Some models offer random start times for security and energy-saving modes to reduce consumption. Ensure compatibility with your device’s voltage and power requirements.
2.3 Understanding the Display and Controls
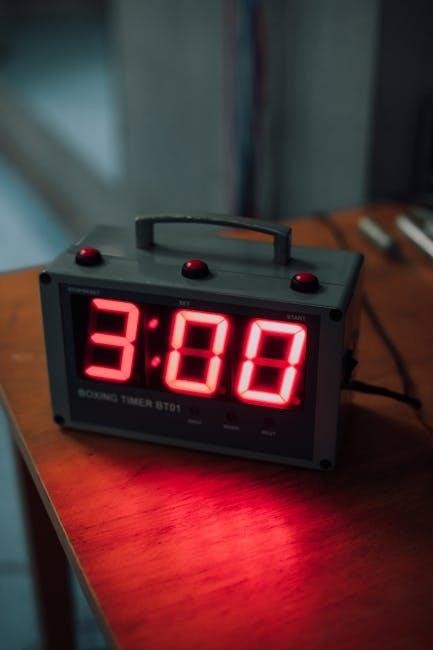
The display typically shows the current time‚ programmed schedules‚ and operational status. Controls may include buttons for setting time‚ selecting days‚ and toggling between modes. Some timers feature touchscreens for intuitive navigation‚ while others use dials or keypads. LED indicators often signal active periods or errors‚ ensuring clear visual feedback for easy operation and troubleshooting.
2.4 Memory Capacity and Programmability
Electronic 7 day timers vary in memory capacity‚ storing up to 20 or more programmable events. They allow users to set specific on/off times for each day‚ with options for multiple time slots. Programmability features include weekly schedules‚ custom start/end times‚ and some models offer battery backup to retain settings. This ensures reliable automation and flexibility for various applications.

Installation and Setup
Installation is straightforward‚ requiring mounting the timer and connecting it to your device. Initial setup involves configuring basic settings like time and day for smooth operation.
3.1 Mounting the Timer
Mount the timer in a convenient location‚ ensuring easy access for programming. Use screws or adhesive strips provided to secure it to a wall or flat surface. Ensure the timer is level and visible for optimal usability. Avoid mounting in direct sunlight or areas prone to moisture to maintain functionality and longevity of the device.
3.2 Wiring the Timer to Your Device
Connect the live wire from your power source to the timer’s input terminal and the output terminal to your device. Ensure compatibility with your device’s voltage and current requirements. Use a multimeter to identify live wires if necessary. Strip wire ends for secure connections and tighten terminal screws firmly. Double-check connections to avoid mixing live and neutral wires. Consult the manual for specific wiring instructions and compatibility information to ensure safe and proper setup.
3.3 Initial Setup and Configuration
After wiring‚ turn on the timer and set the current date and time using the control buttons. Ensure the display shows the correct time format (12/24-hour). Select the desired time zone if applicable. Save the settings to proceed. If your timer has a backlight‚ adjust brightness to your preference. Refer to the manual for button functions and configuration options to complete the setup successfully.
Setting the Timer
Program the weekly schedule‚ set specific days‚ and adjust timings as needed for optimal automation of your devices easily and effortlessly.
4.1 Programming the Weekly Schedule
Start by selecting the desired days of the week on the timer’s display. Choose “Monday” through “Sunday” or opt for specific days. Set the start and end times for each day using the numeric keypad or touch controls. Ensure the timer is in “Program” mode to save your settings. For recurring events‚ enable the repeat function. Review and confirm all programmed times before exiting the setup mode to ensure accuracy. Use the remote control for added convenience in adjusting schedules effortlessly.
4.2 Setting Specific Days and Times
To set specific days and times‚ navigate to the timer’s scheduling menu. Select individual days or multiple days to program. Use the numeric keypad to input the desired on/off times for each day. Utilize the “Copy Day” feature to duplicate settings across similar days. Review and confirm each schedule to ensure accuracy. Save all configurations to apply the programmed settings effectively.
4.3 Adjusting Timer Settings
Adjusting timer settings involves modifying existing schedules or configurations. Access the settings menu to edit on/off times‚ days‚ or durations. Use navigation buttons to select the desired program and modify as needed. Save changes to update the timer’s operation. Regularly review and adjust settings to maintain optimal performance and ensure the timer functions according to your preferences.

Using the Remote Control
The remote control enhances convenience by allowing users to adjust settings‚ turn devices on/off‚ and modify schedules without physical access to the timer.
5.1 Pairing the Remote with the Timer
Pairing the remote with the timer typically involves syncing them via a specific button or mode. Locate the pairing button on both devices‚ press and hold them simultaneously to establish a connection. Ensure both are powered on and within range. Some models may require a reset or entering a pairing mode. Check the manual or manufacturer’s guide for exact steps‚ as procedures may vary. Ensure no interference from other devices and that batteries are fresh for optimal pairing.
5.2 Operating the Timer Remotely
Once paired‚ the remote allows seamless control of the timer. Use the remote to turn the timer on/off‚ adjust schedules‚ or switch between modes. Ensure the remote has clear line-of-sight and is within range for reliable operation. Batteries should be fresh to maintain consistent functionality. Refer to the remote’s button layout in the manual for specific control instructions and troubleshooting tips.
Troubleshooting Common Issues
Identify and resolve timer malfunctions by checking power supply‚ connections‚ and settings. Consult the manual for error codes and reset procedures to ensure proper functionality.
6.1 Timer Not Turning On
If the timer fails to turn on‚ check the power source and ensure it’s properly plugged in. Verify battery installation if applicable and inspect for any visible damage; Reset the device by pressing and holding the reset button. Consult the manual for specific troubleshooting steps to restore functionality.
6.2 Timer Not Following the Set Schedule
If the timer isn’t following the set schedule‚ ensure the time and day are correctly programmed. Check for power outages that may have reset the timer. Verify that the schedule is saved properly and that no conflicts exist in the programming. If issues persist‚ consult the user manual for advanced troubleshooting or reset the timer to its default settings.
Maintenance and Care
Regularly clean the timer with a soft cloth and avoid harsh chemicals. Check the battery level and replace it as needed. Ensure the device is stored in a dry‚ cool environment to prevent damage and maintain optimal performance.
7.1 Cleaning the Timer
To clean the timer‚ use a soft‚ dry cloth to gently wipe away dust and dirt from the surface. For stubborn stains‚ lightly dampen the cloth with water‚ but avoid moisture entering the device. Never use harsh chemicals or abrasive cleaners‚ as they may damage the display or controls. Regular cleaning ensures optimal functionality and maintains the timer’s performance over time.
7.2 Replacing the Battery
To replace the battery‚ first turn off the timer and locate the battery compartment‚ usually found on the back or bottom. Open the compartment‚ remove the old battery‚ and insert the new one‚ ensuring the correct polarity. Replace the compartment securely. Use the battery type recommended in the manual for optimal performance. Regular replacement ensures uninterrupted functionality.

Advanced Features
Electronic 7 day timers offer advanced features like random start times for security‚ energy-saving modes‚ and smartphone compatibility‚ enhancing functionality and user convenience significantly.
8.1 Random Start Times for Security
Random start times enhance home security by making it appear occupied. This feature varies device activation times‚ deterring potential intruders by creating an unpredictable schedule‚ adding an extra layer of protection when you’re away‚ while maintaining simplicity and energy efficiency through programmable settings.
8.2 Energy-Saving Modes
Energy-saving modes optimize power consumption by automatically adjusting timer operations. These modes reduce standby power‚ deactivate unnecessary features‚ and ensure devices only operate when needed. They contribute to lowering energy bills and environmental impact without compromising functionality‚ making them a practical choice for environmentally conscious users seeking efficient solutions for their daily schedules.

Safety Precautions
- Always handle the timer with dry hands to prevent electrical shock.
- Avoid installing near flammable materials or high-temperature sources;
- Keep the device out of reach of children and pets.
- Use the timer only for its intended purposes as specified.
9.1 Electrical Safety Tips
Ensure the timer is installed by a licensed electrician to avoid risks. Keep it away from water and moisture to prevent short circuits. Avoid overloading circuits‚ as this can cause overheating. Use surge protectors to safeguard against voltage spikes. Regularly inspect cords for damage. Never touch electrical components with wet hands. Follow the manufacturer’s guidelines strictly to maintain safety standards and prevent potential hazards. Always unplug before servicing or repairing. Keep children away from electrical devices to ensure their safety and prevent accidental shocks or damage. Properly ground the device to avoid electrical shock. Regularly check for firmware updates to ensure optimal performance and safety. Use the timer only with compatible devices as specified in the manual. Never attempt to modify the internal components‚ as this can lead to electrical hazards. Ensure all connections are secure to prevent loose wires‚ which can cause fires or electrical issues. Always turn off the power before making any adjustments or repairs. Use the correct voltage rating as specified to prevent damage or electrical fire. Keep the timer away from direct sunlight and heat sources to maintain its functionality and safety. Report any malfunction immediately to the manufacturer or a professional. Follow local electrical codes and regulations when installing or using the timer. Dispose of the timer responsibly at the end of its lifecycle to prevent environmental hazards.
9.2 Avoiding Overheating
To prevent overheating‚ ensure proper ventilation around the timer. Avoid placing it in direct sunlight or near heat sources. Keep it away from enclosed spaces without airflow. Regularly check for dust buildup‚ which can trap heat. Use a surge protector to safeguard against power spikes. Monitor the device’s temperature during operation and ensure it’s installed in a cool‚ dry location. If overheating occurs‚ turn it off immediately to prevent damage. Always follow the manufacturer’s guidelines for operating conditions to maintain safety and functionality. Ensure the timer is not overloaded with excessive programming or high-power devices‚ as this can strain its components. Never block the ventilation slots‚ as this can impede heat dissipation. If the timer feels unusually hot‚ unplug it and allow it to cool before restarting. Keep it away from flammable materials to reduce fire risks. Regularly inspect the timer for any signs of wear or damage that could contribute to overheating. Always operate the timer within the recommended temperature range specified in the manual. Avoid placing it near appliances that generate heat‚ such as ovens or heaters‚ to maintain a stable operating environment. By following these steps‚ you can prevent overheating and ensure the timer functions reliably over time.
User Guide and Manual
A user guide provides detailed instructions for setting up and operating the timer‚ including programming‚ troubleshooting‚ and maintenance tips to ensure optimal performance and longevity.
10.1 Reading the Manual
Reading the manual is essential for understanding your timer’s features and operations. It outlines step-by-step instructions‚ troubleshooting guides‚ and safety precautions‚ ensuring proper setup and usage. The manual also covers programmable functions‚ error codes‚ and maintenance tips‚ helping users maximize efficiency and resolve issues quickly. Always refer to it for optimal performance.
10.2 Understanding Error Codes
Error codes on your timer indicate specific issues‚ such as power failures or programming errors. Refer to the manual to decode these codes‚ as they guide troubleshooting steps. Common codes include E1 for battery issues or E2 for scheduling conflicts. Understanding these codes helps resolve problems efficiently‚ ensuring your timer operates smoothly. Always consult the manual for accurate interpretations.

Comparing Different Models
Electronic 7-day timers vary by features‚ compatibility‚ and user needs. Compare basic models with smart timers for differences in programmability‚ connectivity‚ and advanced features like remote access.
11.1 Basic vs. Smart Timers
Basic timers offer simple scheduling with manual controls‚ ideal for straightforward tasks. Smart timers‚ however‚ feature advanced capabilities like app control‚ voice commands‚ and integration with smart home systems‚ providing greater flexibility and convenience for modern users.
11.2 Choosing the Right Model for Your Needs
Selecting the right timer involves assessing your specific requirements. Consider the number of devices to control‚ desired features like remote access‚ and compatibility with your existing systems. Evaluate ease of use‚ memory capacity‚ and programmability to ensure the timer aligns with your lifestyle and technical preferences for optimal functionality and efficiency.
Frequently Asked Questions
Can I control the timer via smartphone? Yes‚ many models do. Is it compatible with smart home systems? Check specifications for details.
12.1 Can I Control the Timer via Smartphone?
Yes‚ many modern electronic 7-day timers are smartphone-compatible‚ allowing control through dedicated apps. Ensure your timer supports Wi-Fi or Bluetooth connectivity. Download the compatible app‚ follow pairing instructions‚ and you can program schedules or adjust settings remotely for added convenience.
12.2 Is the Timer Compatible with Smart Home Systems?
Many advanced electronic timers are compatible with popular smart home systems like Alexa or Google Home. Check if your timer supports these integrations. Compatibility allows voice control and seamless integration with other smart devices‚ enhancing automation and convenience in your home.