
Installation instructions provide clear, step-by-step guidance for successfully setting up products or software․ They ensure safety, efficiency, and proper functionality, helping users avoid common mistakes and errors․
1․1 Importance of Following Installation Guidelines
Following installation guidelines is crucial for ensuring the correct and safe setup of products or software․ Proper adherence prevents errors, system instability, or even physical harm․ Guidelines help users avoid common mistakes, such as incorrect configurations or incompatible hardware․ By following instructions, individuals can ensure compatibility, optimal performance, and warranty validity․ This step is essential for achieving a successful and trouble-free installation experience, whether for software, hardware, or physical products․
1․2 Common Mistakes to Avoid During Installation
Common installation mistakes include skipping system requirement checks, ignoring safety precautions, and not following step-by-step instructions․ Users often overlook pre-installation preparation, such as failing to gather necessary tools or materials․ Additionally, rushing through the process or not verifying compatibility can lead to errors․ Ignoring on-screen prompts or misaligning components can cause malfunctions․ Proper preparation and attention to detail are key to avoiding these pitfalls and ensuring a smooth installation process․

Pre-Installation Preparation
Pre-installation preparation involves checking system requirements, ensuring compatibility, and gathering necessary tools and materials․ This step ensures a smooth installation process and minimizes potential issues․
Additionally, preparing the physical environment, such as clearing workspace or ensuring power availability, is crucial․ Proper preparation helps avoid delays and ensures all components are ready for installation․
2․1 Checking System Requirements
Checking system requirements ensures compatibility and proper functionality․ Verify hardware specifications, operating system version, and software dependencies․ Ensure your system meets the minimum and recommended requirements for installation․
Additionally, check for any specific drivers or updates needed․ This step prevents installation failures and ensures optimal performance․ Always refer to the official documentation for accurate system requirements․
Ignoring system requirements may lead to installation issues or poor functionality․ Proper preparation guarantees a smooth and successful installation process for both hardware and software․
2․2 Gathering Necessary Tools and Materials
Gathering the right tools and materials is essential for a smooth installation process; Start by reviewing the product manual to identify all required items․ Common tools include screwdrivers, wrenches, and fasteners․ Ensure you have all hardware components, such as screws, bolts, and brackets․ Additionally, prepare safety gear like gloves and goggles․ For software installations, have the installation files or CDs ready․ Always check for any specific requirements mentioned in the product documentation to avoid delays or complications during the process․

Software Installation Instructions
Software installation involves downloading the installer, running it, and following on-screen prompts․ Ensure system requirements are met for a smooth setup and proper functionality post-installation․

3․1 Downloading and Running the Installer
Begin by visiting the official website to download the software installer․ Ensure the file is from a trusted source to avoid security risks․ Once downloaded, locate the file, typically in the Downloads folder, and double-click to run it․ Depending on your system, you may need administrative permissions․ Follow any prompts to proceed, such as agreeing to terms or choosing installation settings․ A progress bar will indicate the download and installation status․ Be patient and avoid interrupting the process to ensure a successful setup․
3․2 Following On-Screen Prompts for Completion
Once the installer is running, carefully follow the on-screen instructions to complete the installation․ Review and accept the terms of the agreement if prompted․ Select the installation location and choose any additional features or components to include․ Click “Next” or “Continue” to progress through each step․ When prompted, select “Install” to begin the installation process․ Wait for the progress bar to complete, ensuring no interruptions․ Upon completion, click “Finish” to finalize the setup․ Some installations may require a system restart to apply changes․

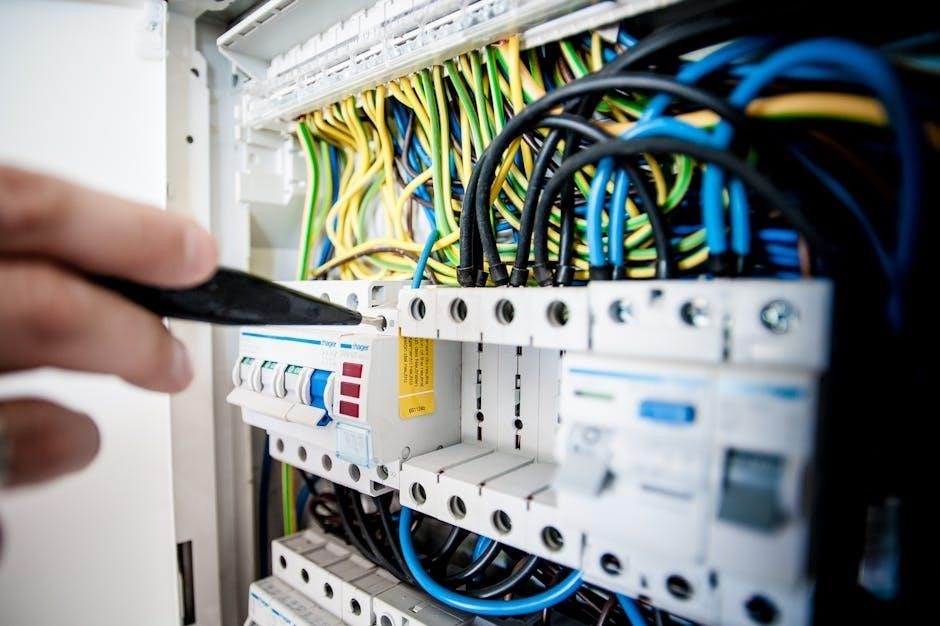
Hardware Installation Instructions
Hardware installation involves preparing the environment, handling components carefully, and following detailed step-by-step guides to ensure proper assembly and secure connections for optimal performance and safety․
4․1 Preparing the Physical Environment
Preparing the physical environment is crucial for a smooth installation process․ Ensure the workspace is clean, well-lit, and free from obstructions․ Verify that all necessary tools and materials are within reach․ Check for proper ventilation and ensure the area is safe from potential hazards․ For hardware installations, confirm the availability of power sources and appropriate flooring․ Additionally, review the product manual to identify any specific environmental requirements, such as temperature or humidity levels․ Proper preparation minimizes delays and ensures a safe working conditions․
4․2 Step-by-Step Assembly and Connection
Begin by carefully unpacking and organizing all components․ Refer to the product manual for specific assembly sequences․ Align parts precisely, ensuring proper fitment before securing with fasteners․ Use recommended tools to avoid damage․ Connect cables and pipes according to the diagram, verifying tightness and orientation․ For complex systems, follow the step-by-step guide or video tutorials․ Test all connections before finalizing the installation․ If uncertain, consult the troubleshooting section or seek professional assistance to ensure reliability and safety․ Proper assembly ensures optimal performance and longevity of the installed product․

Specific Product Installation Guides
These guides provide detailed instructions for installing particular products, such as convertible top kits, Roxtec cable seals, and others, ensuring proper setup and functionality․
5․1 Instructions for Convertible Top Kits
Installing a convertible top kit requires precise preparation and alignment․ Begin by assembling all components, ensuring proper fitment and alignment with your vehicle’s specifications․ Carefully attach the fabric or vinyl top, securing it tightly to avoid wrinkles․ Weatherproof sealing is crucial for durability․ Follow manufacturer guidelines for adhesive application and fastening mechanisms․ Test the top’s functionality post-installation to ensure smooth operation․ Address any issues promptly to maintain structural integrity and prevent leaks․ Proper installation ensures a seamless and enjoyable convertible experience․
5․2 Guidelines for Roxtec Cable and Pipe Seals
Installing Roxtec cable and pipe seals requires careful preparation to ensure a secure and weather-tight connection․ Begin by cleaning the area around the penetration point․ Cut the cable or pipe to the correct length, ensuring it fits snugly through the Roxtec seal․ Use the provided tools to compress the seal, ensuring even pressure for a tight fit․ Proper alignment and tightening are essential to prevent leaks․ Follow the manufacturer’s guidelines for specific materials and environments․ Regular inspection and maintenance are recommended to uphold the seal’s integrity and longevity․

Troubleshooting Common Installation Issues
Identify errors by checking system logs and error messages․ Verify compatibility and system requirements․ Inspect connections and ensure proper alignment․ Use diagnostic tools to resolve issues effectively and quickly․
6․1 Identifying and Resolving Errors
Begin by reviewing system logs and error messages to pinpoint issues․ Inspect connections and alignments for hardware installations․ Consult user manuals or online resources for solutions․ For software, reinstall or update drivers if necessary․ Address compatibility problems by checking system requirements․ If unresolved, contact technical support or refer to diagnostic tools for further assistance․ Ensure all steps are followed methodically to restore functionality and prevent recurrence of errors․
6․2 Using Diagnostic Tools for Assistance
Diagnostic tools are essential for identifying installation issues․ Use system logs and error messages to pinpoint problems․ Employ software-specific diagnostic tools, like Intel HAXM for virtualization or VPN client diagnostics for connectivity․ Run automated checks to detect misconfigurations․ Interpret the results to guide repairs․ For hardware, utilize tools like Roxtec seal diagnostics to ensure proper connections․ If issues persist, consult user manuals or contact technical support for further assistance․ These tools streamline troubleshooting, saving time and ensuring accurate resolutions․
Best Practices for Successful Installation
Plan carefully, ensure all components align properly, and secure connections firmly․ Double-check configurations and run diagnostic tests to confirm functionality․ Follow guidelines precisely for optimal results․
7․1 Ensuring Proper Alignment and Fit
Proper alignment and fit are critical for a successful installation․ Begin by measuring and marking the installation area accurately․ Use shims or adjustment tools to align components precisely․ Ensure all parts fit snugly without forcing them into place, as this can cause damage․ Double-check the alignment using leveling tools or gauges․ Verify that all connections are secure and evenly spaced․ Refer to the manufacturer’s guidelines for specific tolerances and fit requirements․ Proper alignment ensures stability, safety, and optimal performance of the installed system․ Always test the fit before finalizing the installation․
7․2 Securing Connections and Fasteners
Securing connections and fasteners is essential for a durable and safe installation․ Always use the recommended tools to tighten fasteners to the specified torque․ Ensure all connections are snug and even to prevent uneven wear․ Use materials like washers or locknuts to prevent loosening over time․ After tightening, perform a final check to ensure no connections are loose․ Properly secured fasteners enhance the stability and longevity of the installed system, minimizing the risk of future repairs or maintenance․
Following these instructions ensures a successful installation, minimizing errors and enhancing performance․ Conduct final checks, test functionality, and seek professional help if issues arise․ Proper installation guarantees reliability and safety․
8․1 Final Checks and Testing
After completing the installation, perform a thorough inspection to ensure all components are correctly aligned and securely fastened․ Test the system or product under various conditions to verify proper functionality․ Check for any loose connections, leaks, or misalignments that could affect performance․ Run diagnostic tests if available to confirm everything operates as intended․ Address any issues promptly to prevent future complications․ This step ensures reliability, safety, and optimal performance of the installed system or product․ Consulting troubleshooting guides can help resolve any remaining concerns․
8․2 Seeking Professional Help When Needed
If you encounter complexities or uncertainties during installation, consider consulting a professional․ Experts can address advanced technical challenges, ensuring compliance with safety standards and optimal performance․ They often have specialized tools and knowledge to handle intricate systems, such as Roxtec cable seals or convertible top kits․ Additionally, professionals can provide warranties and guarantees for their work․ Don’t hesitate to seek assistance if DIY installation risks causing damage or compromising safety․ Their expertise ensures a reliable and long-lasting setup, saving time and potential costs in the long run․