
Converting a Nissan 240sx from automatic to manual transmission is a popular modification, offering enhanced driver control and engagement.
Parts typically cost between $400-$800,
depending on the chosen transmission and components.
Enjuku Racing provides comprehensive kits for a successful 5-speed swap, ensuring competitive pricing and all necessary parts.
Overview of the Swap
The 240sx auto-to-manual swap fundamentally alters the driving experience, replacing the convenience of automatic operation with the direct control of a manual gearbox. This process involves a comprehensive parts replacement, including the transmission itself, pedal assembly, clutch components, and associated wiring.
Essentially, you’re removing the entire automatic transmission system and installing a complete manual setup. This isn’t simply a transmission change; it’s a system overhaul. Kits, like those offered by Enjuku Racing, aim to simplify this by bundling essential components. The swap enhances driver engagement and allows for greater control over gear selection and engine RPM, ultimately improving performance and driving enjoyment.
Why Swap? Benefits of a Manual Transmission
Swapping to a manual transmission in a 240sx unlocks a more connected and engaging driving experience. Unlike automatics, manuals offer complete driver control over gear selection, allowing for precise engine RPM management and optimized performance. This translates to quicker acceleration and more responsive handling, particularly beneficial for spirited driving or track use.
Beyond performance, a manual swap often reduces weight compared to the automatic system, further enhancing agility. Many enthusiasts prefer the tactile feedback and direct control a manual provides, fostering a stronger connection with the vehicle. It’s a modification driven by a desire for a more immersive and rewarding driving experience.
Cost Considerations: Budgeting for the Swap
Budgeting for a 240sx auto-to-manual swap requires careful planning. Initial estimates range from $400 to $800, but this can fluctuate significantly. A used transmission can be found for around $500, though condition is crucial. Expect to spend upwards of $900 for a reliable unit on platforms like eBay.
Beyond the transmission itself, factor in costs for a pedal assembly, clutch kit, flywheel, and potentially ECU tuning. Specialty tools, like a clutch alignment tool, add to the expense. Labor costs, if outsourcing the work, can easily exceed $500. Contingency funds are vital for unexpected issues or additional parts – aim for at least 10-15% of the total estimated cost.

Parts Required for the Swap
Essential components include a transmission (KA24DE, SR20DET, or T56), pedal assembly, clutch kit, flywheel, wiring harness modifications, and a compatible ECU.

Transmission Options: KA24DE/SR20DET/T56
Selecting the right transmission is crucial for your 240sx manual swap. The KA24DE transmission is a cost-effective option, readily available and relatively simple to install, often found for around $500. The SR20DET transmission offers closer gear ratios, ideal for performance builds, but typically costs more.
For those seeking significant upgrades, the T56 Magnum-F 6-speed manual transmission provides robust strength and wider gear spread, especially beneficial for high-horsepower 2JZ swapped cars. However, T56 swaps require a dedicated kit, costing approximately $499.95, and more extensive modifications. Consider your budget, power goals, and desired driving experience when making your choice.

Pedal Assembly and Master Cylinder
Converting from automatic necessitates installing a manual pedal assembly, including the clutch pedal. Sourcing a complete assembly from a 240sx that originally came with a manual transmission is often the easiest route. Alternatively, aftermarket options are available, ensuring compatibility and proper fitment.
A compatible master cylinder is also essential for actuating the clutch. Ensure the master cylinder is appropriately sized for the transmission and clutch combination. Proper bench bleeding of the master cylinder before installation is vital to eliminate air in the hydraulic system. Careful attention to these components guarantees smooth and reliable clutch operation.
Clutch Kit Selection
Choosing the right clutch kit is crucial for a successful 240sx manual swap. Consider your power goals and driving style. A stock replacement clutch is suitable for mild builds, while performance clutches are necessary for increased horsepower and aggressive driving.
Clutch kits typically include the pressure plate, clutch disc, throw-out bearing, and pilot bearing. Pay attention to the clutch disc’s diameter and spline count to ensure compatibility with the flywheel and transmission. Upgraded kits may feature stronger pressure plates and heat-resistant friction materials for enhanced durability and performance. Proper clutch selection ensures optimal engagement and longevity.
Flywheel Considerations
Selecting the correct flywheel is vital during a 240sx auto-to-manual swap. Flywheel weight impacts engine responsiveness and inertia. Lighter flywheels offer quicker revs, ideal for racing, but can make street driving jerky. Heavier flywheels provide smoother engagement and better low-end torque, suiting daily driving.
Ensure the flywheel is balanced to prevent vibrations. Flywheels are often specific to the transmission chosen (KA24DE, SR20DET, T56). Consider a steel flywheel for strength or an aluminum flywheel for weight savings. Inspect the flywheel surface for damage before installation and resurface if necessary for optimal clutch contact.
Wiring Harness Modifications
The 240sx automatic and manual transmission wiring differs significantly, necessitating harness modifications. The automatic transmission wiring will need to be removed or repurposed. A manual transmission requires wiring for the reverse light switch and potentially a vehicle speed sensor (VSS), depending on the ECU;
Carefully study wiring diagrams for both transmission types. Some swaps require splicing into existing wires, while others benefit from a standalone wiring solution. Proper wiring ensures the reverse lights function and the ECU receives accurate speed signals for correct operation and tuning. Incorrect wiring can lead to transmission or ECU malfunctions.
ECU Compatibility and Tuning
Ensuring ECU compatibility is crucial after a 240sx auto-to-manual swap. The factory ECU is designed for the automatic transmission and may not function optimally with a manual setup. Issues can include incorrect speed signals or improper engine management.
Standalone ECUs or ECU reflashing are common solutions. Standalone units offer full control, while reflashing modifies the existing ECU’s parameters. Tuning is essential to calibrate the engine for the manual transmission, optimizing performance and fuel efficiency. Proper tuning addresses the altered drivetrain dynamics and ensures smooth operation; Ignoring this step can lead to poor performance or engine damage.
Driveshaft and Axle Adjustments
Following a 240sx auto-to-manual swap, driveshaft and axle adjustments are often necessary. The manual transmission may have a different output flange than the automatic, requiring a custom driveshaft or adapter. Axle length can also be affected, particularly when swapping to a different transmission type like the T56.
Verify proper driveshaft length to avoid vibrations or stress on the transmission. Inspect axles for correct engagement and clearance. Modifications or replacement axles might be needed to ensure proper fitment and functionality; Accurate measurements and careful installation are vital for a reliable and safe drivetrain setup.
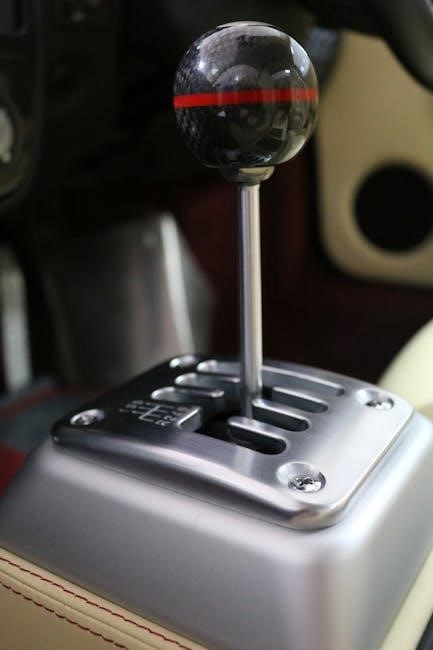
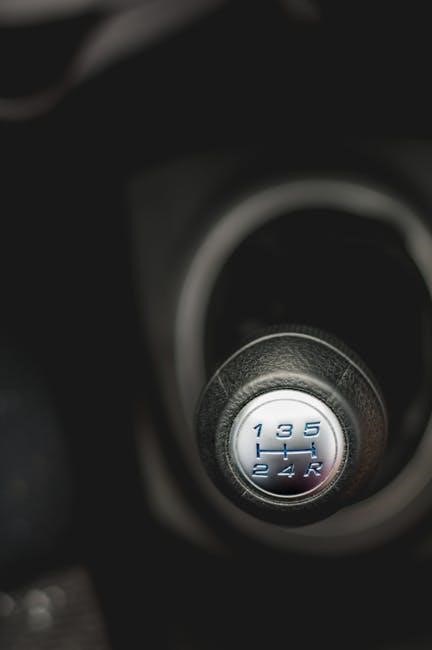
Shifter Assembly and Linkage
Installing the shifter assembly and linkage is crucial for a functional 240sx manual swap. The chosen transmission dictates the specific shifter required; options range from short-throw shifters for performance to stock replacements. Proper linkage adjustment is paramount for precise gear selection.
Ensure the linkage connects securely to the transmission and the shifter base. Adjust the linkage to eliminate any binding or looseness, resulting in smooth and accurate shifts. Incorrect adjustment can lead to difficulty finding gears or even damage to the transmission. Careful attention to detail during this step is essential for a satisfying driving experience.
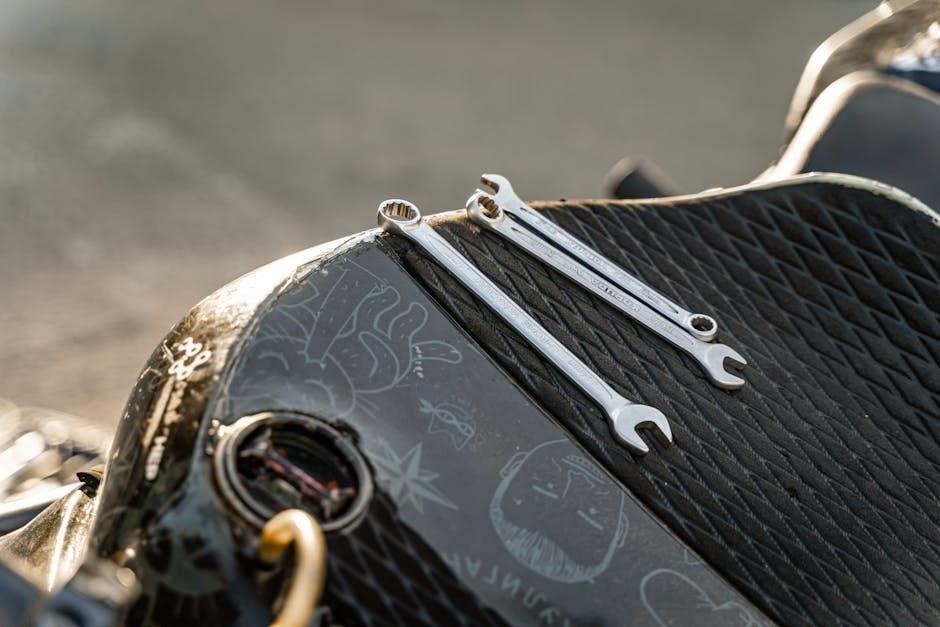
Tools Needed for the Swap
Essential tools include hand tools, a clutch alignment tool, a flywheel holder, a jack, and jack stands for safely lifting and supporting the 240sx.
Essential Hand Tools
Successfully completing a 240sx auto-to-manual swap demands a comprehensive set of hand tools. A socket set, encompassing both metric and standard sizes, is absolutely crucial for disassembly and reassembly of various components. Wrenches, including open-end, box-end, and adjustable types, will be needed for numerous fasteners.
Furthermore, screwdrivers (Phillips and flathead) are essential for interior work and wiring connections. Pliers – including needle-nose and locking pliers – prove invaluable for manipulating hoses and cables. A torque wrench is non-negotiable, ensuring proper tightening of critical bolts to prevent damage or failure. Don’t forget a hammer, pry bar, and various extensions to aid in stubborn component removal.
Specialty Tools: Clutch Alignment Tool, Flywheel Holder
Beyond standard hand tools, a 240sx manual swap necessitates specific specialty items. A clutch alignment tool is absolutely vital; it ensures the clutch disc is perfectly centered during installation, preventing difficulty engaging gears and potential transmission damage. Without proper alignment, shifting will be problematic.
Equally important is a flywheel holder. This tool securely locks the flywheel in place, allowing you to safely torque the flywheel bolts to the manufacturer’s specification. Attempting this without a holder risks damaging the crankshaft threads. Consider also a pilot bearing puller, as removing the old pilot bearing can be challenging. These tools streamline the process and prevent costly errors.
Lifting Equipment: Jack and Jack Stands
A safe and successful 240sx manual swap absolutely requires robust lifting equipment. A floor jack with sufficient weight capacity is essential for raising the vehicle. However, never work under a vehicle supported only by a jack!
Crucially, you’ll need at least two, preferably four, high-quality jack stands. Position these securely under designated reinforced points on the chassis – consult your 240sx’s service manual for correct placement. Ensure the jack stands are rated for more than the vehicle’s weight. Prioritize safety; a collapsed vehicle can cause severe injury. Wheel chocks are also recommended for added security, preventing unwanted rolling.
Step-by-Step Swap Process
The 240sx manual swap involves removing the automatic transmission, installing the manual, connecting the clutch, wiring, and installing the pedal assembly and driveshaft.
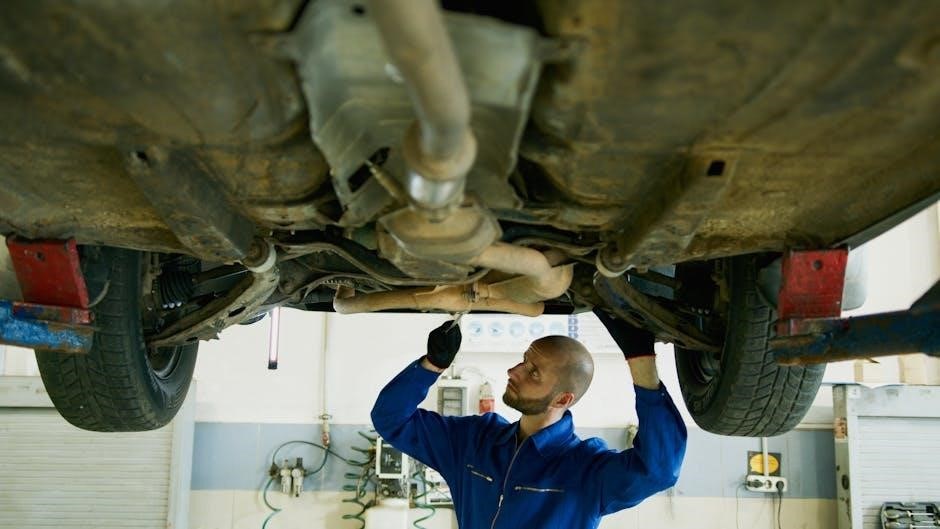
Removing the Automatic Transmission
Begin by safely lifting the 240sx and securing it with jack stands. Disconnect the driveshaft, ensuring you support its weight during removal. Next, detach the shift linkage and any wiring connected to the automatic transmission. Carefully drain the transmission fluid before disconnecting the cooler lines.
Support the engine from above to prevent it from tilting when the transmission is removed. Unbolt the transmission from the engine, taking note of the bolt locations. Slowly lower the automatic transmission using a transmission jack, being mindful of any remaining connections. Inspect the flexplate for damage and remove it, as it won’t be needed for the manual swap.
Installing the Manual Transmission
With the automatic transmission removed, prepare for the manual installation. Install the new flywheel, ensuring it’s properly torqued to the manufacturer’s specifications. Carefully align the clutch disc with the pilot bearing using a clutch alignment tool. Gently lift the manual transmission into position using a transmission jack, aligning the input shaft with the clutch disc.
Slowly raise the transmission until it mates flush with the engine. Secure the transmission with the appropriate bolts, tightening them in a crisscross pattern to ensure even pressure. Reconnect any necessary wiring and the shift linkage. Double-check all connections before proceeding to the next step in the swap process.
Connecting the Clutch System
After installing the transmission, focus on the clutch system. Connect the clutch master cylinder to the pedal assembly, ensuring proper fluid lines are in place and free of leaks. Bleed the clutch line thoroughly to remove any air bubbles, guaranteeing optimal pedal feel and engagement. Install the clutch slave cylinder onto the transmission, connecting it to the clutch fork.
Verify the proper operation of the clutch by depressing the pedal and observing the movement of the clutch fork. Adjust the clutch cable, if applicable, to achieve the correct pedal travel and engagement point. A properly connected and bled clutch system is crucial for smooth shifting and overall driving experience.
Wiring the Manual Transmission
Wiring a manual transmission into a 240sx requires careful attention to detail. The automatic transmission wiring will need to be removed and replaced with the wiring harness for the manual transmission. This often involves connecting wires for the reverse light switch and potentially a vehicle speed sensor (VSS), depending on the transmission chosen;
ECU compatibility is key; modifications to the wiring harness may be necessary to ensure proper communication between the transmission and the engine control unit. Carefully consult wiring diagrams and consider professional assistance if you are unsure about any connections. Incorrect wiring can lead to transmission malfunctions or engine performance issues.
Installing the Pedal Assembly
Installing a manual pedal assembly is a crucial step in the 240sx auto-to-manual swap. The automatic pedal assembly must be completely removed, and the new manual assembly installed in its place. This includes the clutch pedal, which requires drilling new mounting holes in the firewall if they don’t already exist.
Ensure proper alignment and secure mounting of the pedal assembly. Simultaneously, the master cylinder for the clutch needs to be installed and connected to the clutch pedal via the pushrod. Proper adjustment of the pushrod is vital for optimal clutch engagement and pedal feel. Double-check all connections for security before proceeding.
Driveshaft and Axle Installation
Following manual transmission installation, attention turns to the driveshaft and axles. The automatic transmission driveshaft will not be compatible with the manual setup; a shorter driveshaft designed for a manual transmission is required. Axle adjustments may also be necessary, depending on the transmission chosen and the vehicle’s setup.
Carefully install the new driveshaft, ensuring it’s properly secured to the transmission and differential. Inspect the axles for any damage and install them, verifying proper seating in the hubs. Confirm there’s no binding or interference during rotation. Proper driveshaft and axle installation are critical for smooth power delivery and vehicle operation.
Common Issues and Troubleshooting
Potential problems include clutch pedal feel issues, transmission noise, shifting difficulties, and ECU compatibility errors. Careful diagnosis and adjustment are often required for a smooth swap.
Clutch Pedal Feel Issues
Experiencing a spongy or inconsistent clutch pedal feel is a common issue post-swap. This often stems from air trapped within the hydraulic clutch system, requiring thorough bleeding.
Ensure the master cylinder is properly secured and not leaking.
Incorrect clutch cable adjustment (if applicable) or a failing master/slave cylinder can also contribute. Inspect the lines for damage and ensure proper fluid levels.
Sometimes, the issue isn’t the hydraulics themselves, but a worn or improperly installed clutch disc.
Careful inspection and potentially replacement of components may be necessary to achieve optimal pedal feel.
Transmission Noise
Post-swap, unusual noises emanating from the transmission warrant immediate investigation. Whining sounds could indicate low transmission fluid levels or worn internal gears.
Clunking noises during shifts often point to issues with the clutch, flywheel, or driveline components.
Ensure the transmission is properly mounted and that all bolts are securely tightened. Inspect the driveshaft and axles for any signs of damage or imbalance.
Differential noise can sometimes be mistaken for transmission noise, so rule that out as well. Addressing these sounds promptly prevents further damage and ensures a smooth driving experience.
Shifting Problems
Following a 240sx auto-to-manual swap, encountering shifting difficulties is common. Difficulty engaging gears can stem from an improperly adjusted clutch cable or a failing master/slave cylinder. Grinding noises during shifts often indicate synchronization issues within the transmission itself.
Ensure the shifter linkage is correctly aligned and that all bushings are in good condition. Air in the hydraulic clutch line can also cause problems; bleeding the system may resolve this. If issues persist, a professional inspection of the transmission’s internal components is recommended to diagnose and rectify any underlying mechanical faults.
ECU Compatibility Problems
After a 240sx auto-to-manual swap, the original automatic transmission-focused ECU may cause compatibility issues. These can manifest as incorrect sensor readings, limp modes, or an inability to properly control the engine with the manual transmission. Tuning the ECU is often essential to optimize performance and prevent drivability problems.
Consider aftermarket standalone ECUs or piggyback systems for greater control. Ensure the chosen ECU supports the swapped transmission and engine combination. Proper tuning addresses issues like fuel mapping, ignition timing, and throttle response, maximizing the benefits of the manual swap. Ignoring ECU compatibility can lead to reduced power and potential engine damage.
Post-Swap Adjustments and Maintenance
Following the 240sx manual swap, proper clutch adjustment and regular transmission fluid changes are crucial for longevity and optimal performance.
ECU tuning is also recommended.
Clutch Adjustment
Proper clutch adjustment is paramount after a 240sx auto-to-manual swap, ensuring smooth engagement and preventing premature wear. Begin by verifying the clutch pedal free play, typically around 0.5 to 1 inch. Insufficient free play can cause constant disengagement, while excessive play hinders full clutch engagement.
Adjust the clutch cable, if applicable, using the adjuster located near the pedal or transmission. For hydraulic systems, bleeding the system is essential to remove air bubbles and maintain consistent pressure. Monitor for signs of slippage during acceleration or difficulty shifting, indicating a need for further adjustment. Regular checks and fine-tuning will maximize the lifespan and performance of your new clutch system.
Transmission Fluid Changes
Regular transmission fluid changes are crucial for maintaining the longevity and optimal performance of your newly installed manual transmission in your 240sx. Following the swap, the initial fluid change should occur within the first 500-1000 miles to remove any metal shavings or debris generated during the break-in period.
Subsequently, adhere to a fluid change interval of approximately 30,000-60,000 miles, depending on driving conditions and the type of fluid used. Utilize the manufacturer’s recommended fluid specification for your specific transmission (KA24DE, SR20DET, or T56). Proper fluid levels and quality ensure smooth shifting, reduce wear, and prevent costly repairs down the line.
ECU Tuning and Optimization
Post-swap, ECU tuning is often necessary to ensure optimal performance and compatibility with the manual transmission in your 240sx. The automatic transmission ECU parameters differ significantly from those required for a manual setup, potentially leading to suboptimal engine operation and driveability issues.
Tuning allows for adjustments to fuel maps, ignition timing, and other critical parameters to match the new drivetrain configuration. This can unlock additional horsepower, improve throttle response, and eliminate any potential drivability concerns. Consider utilizing a standalone ECU or a re-flash service to achieve the best results. Proper tuning is vital for maximizing the benefits of your manual swap.

Resources and Support
Online forums and communities dedicated to the 240sx are invaluable for swap guidance. Enjuku Racing and other suppliers offer parts and support.
Online Forums and Communities
Numerous online platforms provide crucial support for your 240sx auto-to-manual swap. Dedicated 240sx forums are brimming with experienced enthusiasts who have completed similar conversions, offering invaluable advice and troubleshooting assistance. These communities often host detailed build threads, covering every aspect of the swap process, from parts selection to wiring diagrams.
Ubuntu forums, while not specifically 240sx focused, demonstrate the power of community support for technical projects. Searching these forums can reveal helpful problem-solving strategies applicable to the swap’s electronic components. Leveraging these resources can significantly reduce frustration and ensure a smoother, more successful conversion experience.
Parts Suppliers
Sourcing components for a 240sx auto-to-manual swap requires careful consideration. Enjuku Racing is a prominent supplier, specializing in 240sx performance parts and offering complete 5-speed swap kits at competitive prices. eBay can be a viable option, but be cautious – transmission costs can range widely, potentially exceeding $900 for a good condition unit.
Consider suppliers offering T56 Magnum-F 6-speed manual swap kits, particularly if aiming for a more modern transmission. Ensure compatibility with your specific 240sx model. Thoroughly research supplier reputations and warranty policies before committing to a purchase, prioritizing quality and reliability for a successful swap.
Professional Installation Services
Undertaking a 240sx auto-to-manual swap is a complex process, and professional installation is a worthwhile consideration for those lacking extensive mechanical experience. While DIY is possible, a skilled technician ensures correct installation, minimizing potential issues like clutch pedal feel problems or transmission noise.
Locating a shop specializing in Nissan performance or manual transmission swaps is crucial. Expect labor costs to vary significantly based on location and shop rates. A professional installation guarantees proper wiring harness modifications, ECU compatibility checks, and accurate drivetrain adjustments, ultimately saving time and potential headaches. Research local shops and obtain quotes before proceeding.