
Welcome to the milling machine manual, your comprehensive guide to understanding and operating milling machines effectively. This manual covers safety, operation, and maintenance essentials for optimal performance.
1.1 History and Evolution of Milling Machines
The milling machine has evolved significantly since its inception in the late 18th century. Early versions were simple, manual tools used for shaping metal and wood. The Industrial Revolution brought mechanical advancements, leading to powered milling machines. By the 20th century, CNC (Computer Numerical Control) technology transformed milling into a precise, automated process. Today, milling machines are indispensable in modern manufacturing, offering versatility and efficiency for cutting and shaping materials with high accuracy.
1.2 Importance of Milling Machines in Modern Manufacturing
Milling machines are cornerstone tools in modern manufacturing, enabling precise cutting, drilling, and shaping of materials. Their versatility allows for creating complex geometries and custom parts, making them essential across industries like aerospace, automotive, and construction. By ensuring high accuracy and efficiency, milling machines contribute significantly to producing durable and reliable components, driving innovation and maintaining quality standards in manufacturing processes globally.
Safety Precautions and Guidelines
Always wear protective gear, including safety glasses and gloves, when operating a milling machine. Keep loose clothing and long hair tied back, and ensure hands are clear during operation. Adhere strictly to emergency procedures and best practices to prevent accidents and ensure a safe working environment.
2.1 General Safety Rules for Operating Milling Machines
Always wear safety glasses and gloves when operating a milling machine. Ensure loose clothing and long hair are tied back to avoid entanglement. Keep hands clear of moving parts during operation. Never operate the machine while distracted or tired. Avoid using the machine for unauthorized purposes. Regularly inspect tools and accessories for damage. Maintain a clean and organized workspace to prevent accidents. Familiarize yourself with emergency stop procedures and follow all safety guidelines provided in the manual.
2.2 Emergency Procedures and Best Practices
In case of an emergency, immediately press the emergency stop button to halt the machine. If a tool breaks, turn off the spindle and carefully remove debris. For power failure, wait until the machine stops completely before restarting. If a part malfunctions, disconnect power and contact maintenance. Always evacuate the area if a serious incident occurs. Regularly practice emergency drills and ensure all operators are trained in these procedures. Refer to the manual for detailed emergency response plans.
Machine Setup and Installation
Setting up and installing a milling machine involves careful unpacking, leveling, and positioning on a stable surface. Follow the manufacturer’s instructions precisely, ensuring all components are securely fastened. Perform initial calibration to align the spindle and axes accurately. Lubricate moving parts as specified and install any necessary software for CNC models. Always wear protective gear and ensure proper electrical connections. Conduct a test run to verify functionality before commencing operations.
3.1 Step-by-Step Installation Guide
Proper installation is essential for optimal milling machine performance. Begin by carefully unpacking and inspecting all components for damage. Place the machine on a level, stable surface and secure it with anchor bolts. Connect the power supply and ensure all electrical connections are safe. Lubricate moving parts as specified in the manual. Align the spindle and axes precisely, following calibration instructions. Finally, test the machine at low speed to ensure smooth operation before full use.
3.2 Initial Calibration and Adjustment
After installation, calibrate the milling machine to ensure accuracy. Check the spindle alignment and tram the head to achieve perpendicularity with the table. Adjust the gibs and tighten all locking screws. Set the backlash on the lead screws and ensure the vice is squared. Refer to the manual for specific torque values. Perform a test run at low speed to verify smooth operation and make fine adjustments as needed for precise machining results.
Basic Machine Parts and Functions
The milling machine consists of key components like the spindle, table, and column. The spindle holds cutting tools, while the table secures the workpiece. The column provides structural support, and the knee enables vertical movement for precise machining operations.
4.1 Identification of Key Components
The milling machine comprises essential parts such as the spindle, table, column, and knee. The spindle holds cutting tools, while the table secures the workpiece. The column provides stability, and the knee allows vertical adjustment. Other critical components include the overarm, arbor, and quill. Understanding these elements is vital for safe and effective operation. Proper identification ensures accurate setup and maintenance, enhancing overall machining efficiency and precision.
4.2 Understanding the Role of Each Part
The spindle rotates cutting tools and is central to milling operations. The table facilitates workpiece movement and clamping. The column supports the machine’s structure, ensuring stability. The knee enables vertical positioning, crucial for precise cuts. The overarm and arbor assist in tool mounting, while the quill allows deep drilling. Each component’s function must be understood to maximize efficiency, safety, and productivity during milling tasks. Proper utilization of these parts ensures accurate and reliable machining results consistently.

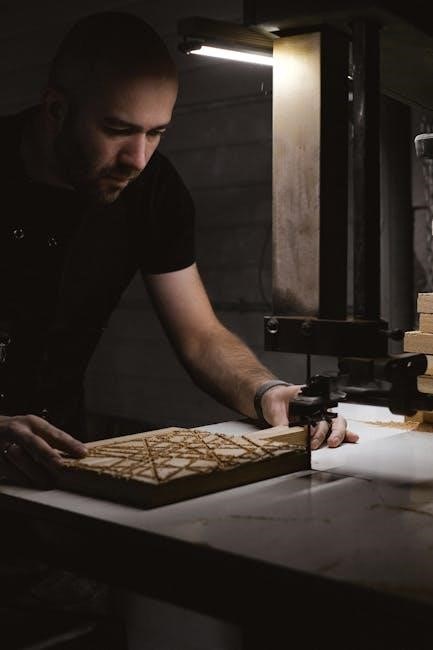
Operating the Milling Machine
Operating the milling machine involves powering up, setting tools, and clamping workpieces. Adjust spindle speed and feed rates for precise cuts. Always ensure safety guards are in place and follow proper protocols for accurate results.
5.1 Tramming the Head and Squaring the Vice
Tramming the head ensures the milling machine’s spindle is perpendicular to the work surface, crucial for accurate cuts. Use a precision indicator to adjust the head. Squaring the vice involves aligning it with the machine’s axes. Secure the vice and check alignment using a square. Adjust the vice jaws as needed. Proper tramming and squaring prevent uneven cuts and enhance machining precision. Always follow best practices for these critical setup steps.
5.2 Setting Spindle Speed and HI/LO Gearing
Setting the spindle speed and selecting HI/LO gearing ensures optimal cutting performance. Choose spindle speed based on material type and tool diameter. Use the gear lever to switch between high and low speed ranges. Always stop the spindle before changing gears to prevent damage. Refer to the machine manual for specific speed and gear recommendations. Proper setup enhances tool life and machining accuracy, ensuring efficient operation. Follow guidelines for precise control and safety.

Maintenance and Troubleshooting
Regularly inspect and clean the machine, ensuring proper lubrication of moving parts. Address common issues like misalignment or worn tools promptly to maintain performance and longevity.
6.1 Routine Maintenance Tasks
Perform routine inspections of the milling machine, focusing on lubrication systems, spindle alignment, and tool wear. Clean debris from the table and ways to ensure smooth operation. Check and top off coolant levels, and replace worn or damaged parts promptly. Regularly grease moving components and tighten all bolts and screws. Maintain a schedule for these tasks to prevent unexpected downtime and ensure optimal performance.
6.2 Common Issues and Solutions
Address common milling machine issues promptly to maintain productivity. Vibrations may indicate spindle misalignment or imbalance; check and adjust the spindle. Excessive wear on tools or workpieces suggests improper setup or dull cutters; ensure tools are sharp and properly secured. If the machine overheats, inspect coolant systems and ensure adequate lubrication. For persistent problems, consult the user manual or contact manufacturer support for specialized assistance.

Advanced Techniques and Tips
Mastering advanced techniques enhances milling precision. Use an indicator for accurate tramming, and optimize cutter geometry for smoother finishes. Regularly update software for improved performance.
7.1 Enhancing Precision and Efficiency
To enhance precision and efficiency in milling operations, ensure proper tramming of the machine head and use high-quality cutting tools. Regular software updates and optimal spindle speed settings are crucial. Maintain accurate alignment and employ efficient clamping techniques to minimize material waste. Consistent lubrication and tool maintenance also contribute to better performance and longer machine lifespan.
7.2 Mastering Manual Milling Operations
Mastering manual milling requires precision and practice. Use an indicator with a clamp to ensure accurate measurements and alignment. Regularly check and adjust backlash to maintain consistency. Employ light cuts and proper workholding techniques to avoid deflection. Keep tools sharp and well-maintained for optimal performance. Practice tramming the head and squaring the vice to enhance accuracy. These techniques will help you achieve professional results and refine your machining skills.
Common Projects and Applications
Discover popular applications of milling machines, from metal cutting and engraving to fabricating custom parts. Ideal for precision tasks like dental engraving, firearms manufacturing, and general engineering projects.
8.1 Metal Cutting and Engraving
Metal cutting and engraving are fundamental applications of milling machines, offering precision in shaping and detailing metal components. Common uses include creating custom parts, engraving designs, and fabricating intricate shapes. These processes are essential in industries like aerospace, automotive, and dentistry. Always ensure the machine is set up correctly and follow safety guidelines to avoid accidents.
8.2 Fabrication of Custom Parts
Fabrication of custom parts is a key application of milling machines, enabling precise creation of complex shapes and designs. Common materials include metals, plastics, and composites. These machines allow for detailed craftsmanship, essential in industries like aerospace, automotive, and manufacturing. Proper setup and techniques ensure high-quality custom parts, making milling machines indispensable for unique fabrication needs.
Additional Resources and Support
Access user manuals, guides, and manufacturer support for milling machines online. Resources include downloadable PDF manuals and software CDs for specific models like Stanko 6m82 and Acra.
9.1 Accessing User Manuals and Guides
User manuals and guides for milling machines are readily available online. Websites offer downloadable PDF versions for models like the Stanko 6m82 and Acra. Many manufacturers provide detailed instructions, including installation, operation, and maintenance tips. Some manuals are included on CDs with control software. For specific models, visit the manufacturer’s official website or contact their support team. Additional resources like troubleshooting guides and software adaptions can also be found online for enhanced functionality.
9.2 Contacting Manufacturer Support
For assistance, contact the manufacturer’s support team via their official website, phone, or email. Many provide dedicated support for troubleshooting, repairs, and technical inquiries. Ensure to have your machine’s model and serial number ready for efficient service. Some manufacturers also offer live chat or FAQs on their websites. Reach out for professional guidance on milling machine operation, maintenance, or software adaptation to ensure optimal performance and resolve any operational issues promptly.